Pies & Tarts
Welcome to pies & tarts! This portion will cover the basics of making pies and tarts. I found that this class was exciting just in the traditional sense of the art of pies. Pies are mainly an American item, which is why we can almost all recall our mom's or grandma's awesome apple pie! What I am going to tell you is a little secret.....come closer.....YOU CAN MAKE A BETTER ONE! Follow these tips and tricks and soon, you'll be able to replicate these beauties!
Enjoy, and eat something!
Enjoy, and eat something!
The Perfect Crust?
Would you believe me if I told you there was such thing as the perfect pie crust? Would you believe me if I said there wasn't?
I am here to tell you, there can not really be such a thing as a perfect pie crust. In the aspect of the industry and how we view the various properties of a crust and how we can utilize it, then yes, there can be such a thing as a perfect crust. This would be a matter of how much liquid the pie can hold, and how strong the dough is, while also being flakey and tasty!
Everyone's perception on the taste of the crust is what makes it difficult to make the "perfect" crust. When I taste a pie crust, I want a buttery, velvety, flakey mouth feel that really gives me the feeling like I am eating a pie. A couple things to consider when making the pie, however, are the quality of the ingredients, and how fast you can mix the dough together. Always working with cold ingredients will better your chances of success with a decent pie dough.
So the question boils down to this; is an all shortening, all butter, or half and half crust better? Well the person to truly answer this would be the consumer, in my opinion, I believe that a pie crust with multiple elements of fat will give a greater, better defined quality of a crust. For instance, we were playing around with different fats in a traditional pie crust formula; and traditionally, pie crusts were made with lard. We had the opportunity to really dive into the different effects the different forms of fat had on the crust and it was amazing. I won't go to in depth about it, because it was a lot to cover, and it would be a lot to go over, however, I was able to utilize lard, shortening, and butter in the pie dough; can I just tell you this- my jaw dropped because of the flavor, texture, and beauty of this crust!
The formula I will be giving is one that is half and half, however, you may substitute almost any fat in the formula, as long as it can be put mended together, such as all of the fats into a mixer and blended with a paddle until they are incorporated into each other. Make sure you work with all of the ingredients as cold as possible. Ice water, close to frozen butter, and putting your dry ingredients under refrigeration would not hurt!
Basic Pie Dough
Ingredients: Yield: 692g (3 crusts)
Pastry Flour- 340g
All-purpose Shortening- 114g
Butter- 114g
Salt- 7g
Water (ice-cold)- 113g
Sugar- 28g
Method of Prep:
1. Gather all the ingredients and equipment
2. Sift flour & salt
3. Cut the fat into the flour by hand
4. Incorporate the water slowly into the flour and fat mixture to form a somewhat sticky dough. Do not overwork the dough.
5. Allow the dough to rest overnight under refrigeration.
Chef's Note- Make sure all the ingredients are cold, the water may be more or less, be careful to not overwork the dough after the addition of the water.
Fruit Pie
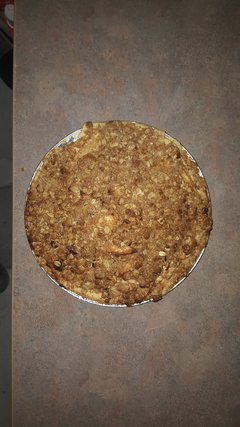
When anyone thinks of pie, the first thought that comes to mind is most likely the stereotypical picture of Grandmom's famous apple pie (or any fruit pie). The characteristic of these pies that makes them so amazing is the traditionalism of it. There are three different methods of making a fruit pie.
The Home-Style method, where the fruit is dredged in sugar, the additional sugar along with the natural sugars found in the fruit will help create that syrup due to the hygroscopic nature of the sugar. The fruit can then have spices added, the fruit must be dredged in a light flour and set in the freezer to chill. The pie is then removed from the cooler and baked immediately. This method uses firm, fresh, seasonal fruit.
The Cooked Juice Method, where only the juice is cooked with the addition of a starch to thicken the liquid, then the fruit is added into the mixture. This method will be used when making pies with fragile fruit fillings, such as blueberry or raspberry.
The Cooked Juice & Fruit Method where the liquid and a portion of the fruit is cooked to the correct consistency, then the remainder of the fruit is folded in after. This method will use firmer textured fruit, however, they can be quite soft. This method also allows for a better texture within the filling itself.
Pies are one of my favorite things to make after this class. From the classic to the most complex, it was challenging and rewarding.
Apple Pie
Pie Dough
*See "The Perfect Crust"*
One pie will take approximately 8.3oz
Roll the dough out about 10-11 inches in diameter
Place in the pan, the best way I found was to roll the dough onto the rolling pin and gently roll it into the pan. Another way is to gently fold the dough in half and place it into the pan, then unfold it and make it even in the pan.
Crimp the edges of the pie crust and set it into the cooler to properly chill.
Apple Pie Filling
Ingredients: Yield: Approx. 4lb 4oz about 3-9" pies
Apples, peeled and chopped - 2lb 8oz
Apple Juice - 1lb 4oz
Granulated Sugar - 6oz
Salt - pinch
Cinnamon - 1tsp
Nutmeg - 1/2tsp
Cornstarch - 2oz
Method Of Prep:
1. Gather ingredients and equipment
2. Combine the apples with 2/3 apple juice, sugar, spices and salt. Bring this mixture to a boil
3. Make a slurry (place the cornstarch in a bowl, slowly add the liquid while whisking to create a milky mixture with NO LUMPS) with the cornstarch and remaining apple juice
4. When the apple mixture begins to boil, slowly add the slurry while stirring constantly with a rubber spatula, this needs to boil for at least 1-3 minutes to cook out the starchy flavor from the cornstarch.
5. Allow the filling to cool before placing into the pie shell, if it is not cooled properly, an uneven bake will occur due to the melting of the butter's fat crystals.
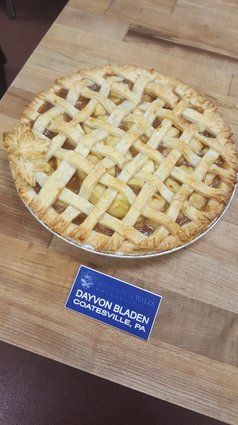
The Lattice is not necessary, but if you would like to do one, heres how:
1. Take another 8.3oz of pie dough, roll the dough out to the diameter of the pan (lip to lip).
2. Start cutting 1/2-3/4" strips out of the dough. They should all be used!
3. Place the first longest strip down the center of the pie, this will be the reference point.
4. From that center strip that you took, you want to skip one and take the next from either side. This will allow for an even lattice.
5. Begin to place those strips on either side of the center and create an even spacing. The average is 7x7, however one can get away with more, as long as they are even on either side.
6. After all those strips are placed, you can either do the same perpendicularly, just place the other set on top of the previous, but to get a true weaved affect this is what you need to do:
Pull the center and every other strip away from its spot, leaving enough room for the strips to keep their place, but also having enough space to place the first center strip (this strip should be the longest).
Bring those strips back over the center strip, then take the strips you had not used before an pull them towards the center of the pie, where they fold over the center strip, then place the next strip in that spot.
Repeat this step until you have placed the remainder of the strips necessary to create an even lattice.
The Home-Style method, where the fruit is dredged in sugar, the additional sugar along with the natural sugars found in the fruit will help create that syrup due to the hygroscopic nature of the sugar. The fruit can then have spices added, the fruit must be dredged in a light flour and set in the freezer to chill. The pie is then removed from the cooler and baked immediately. This method uses firm, fresh, seasonal fruit.
The Cooked Juice Method, where only the juice is cooked with the addition of a starch to thicken the liquid, then the fruit is added into the mixture. This method will be used when making pies with fragile fruit fillings, such as blueberry or raspberry.
The Cooked Juice & Fruit Method where the liquid and a portion of the fruit is cooked to the correct consistency, then the remainder of the fruit is folded in after. This method will use firmer textured fruit, however, they can be quite soft. This method also allows for a better texture within the filling itself.
Pies are one of my favorite things to make after this class. From the classic to the most complex, it was challenging and rewarding.
Apple Pie
Pie Dough
*See "The Perfect Crust"*
One pie will take approximately 8.3oz
Roll the dough out about 10-11 inches in diameter
Place in the pan, the best way I found was to roll the dough onto the rolling pin and gently roll it into the pan. Another way is to gently fold the dough in half and place it into the pan, then unfold it and make it even in the pan.
Crimp the edges of the pie crust and set it into the cooler to properly chill.
Apple Pie Filling
Ingredients: Yield: Approx. 4lb 4oz about 3-9" pies
Apples, peeled and chopped - 2lb 8oz
Apple Juice - 1lb 4oz
Granulated Sugar - 6oz
Salt - pinch
Cinnamon - 1tsp
Nutmeg - 1/2tsp
Cornstarch - 2oz
Method Of Prep:
1. Gather ingredients and equipment
2. Combine the apples with 2/3 apple juice, sugar, spices and salt. Bring this mixture to a boil
3. Make a slurry (place the cornstarch in a bowl, slowly add the liquid while whisking to create a milky mixture with NO LUMPS) with the cornstarch and remaining apple juice
4. When the apple mixture begins to boil, slowly add the slurry while stirring constantly with a rubber spatula, this needs to boil for at least 1-3 minutes to cook out the starchy flavor from the cornstarch.
5. Allow the filling to cool before placing into the pie shell, if it is not cooled properly, an uneven bake will occur due to the melting of the butter's fat crystals.
The Lattice is not necessary, but if you would like to do one, heres how:
1. Take another 8.3oz of pie dough, roll the dough out to the diameter of the pan (lip to lip).
2. Start cutting 1/2-3/4" strips out of the dough. They should all be used!
3. Place the first longest strip down the center of the pie, this will be the reference point.
4. From that center strip that you took, you want to skip one and take the next from either side. This will allow for an even lattice.
5. Begin to place those strips on either side of the center and create an even spacing. The average is 7x7, however one can get away with more, as long as they are even on either side.
6. After all those strips are placed, you can either do the same perpendicularly, just place the other set on top of the previous, but to get a true weaved affect this is what you need to do:
Pull the center and every other strip away from its spot, leaving enough room for the strips to keep their place, but also having enough space to place the first center strip (this strip should be the longest).
Bring those strips back over the center strip, then take the strips you had not used before an pull them towards the center of the pie, where they fold over the center strip, then place the next strip in that spot.
Repeat this step until you have placed the remainder of the strips necessary to create an even lattice.
|
|
