Fundamental Skills & Techniques
This section of the blog is going to be mostly explantation with some pictures. We will be visiting basic techniques and some advanced skills that provide a pastry chef with the tools necessary to succeed in the industry. Now, as my instructor had said, practice makes perfect, and with these skills, one may need a steady hand, or good reflexes. So, I present to you, Fundamental skills!!
Basic Measurements
Did you ever think back on a dinner or dessert and just marvel at the idea of how it was made? Like what ingredients were put in there, and how did they make it so smooth, or so delicious. Well with a dinner, the chef has almost all of the power to determine flavor within the dish; although this may be true for a pastry chef, he/she needs to follow a *formula to produce the perfect dessert/pastry for his/her consumers. By knowing the following measurements & conversions, there will no longer be a need to think hard about how much of this should go into that!
Ok, so first, I would like to introduce you to my close friend, Mr. Gallon:
Ok, so first, I would like to introduce you to my close friend, Mr. Gallon:
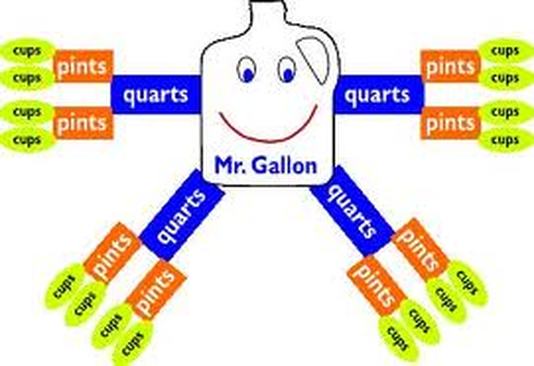
Mr. Gallon is the easiest form of converting liquid measurements. In a gallon, there are four quarts. In a quart, there are two pints. In one pint there are two cups. Now if you wanted to find out how many cups were in one quart, it can easily be done by finding one quart, and tracing it back down to the cups, there you will see four cups. So four cups equal one quart. This method is true for the whole diagram.
In modern recipes, it is always about simplifying something down, or making it easy for the person producing something to make. In Johnson & Wales, there are almost no instances when liquid measurements like cups, pints, quarts, or gallons are used. We base our formulas on weight, we also stray away from using ounces and pounds, we gear towards the metric side and use grams mostly.
Now that we know how to measure cups, let's go smaller, to Tablespoons & Teaspoons:
3 tsp = 1 Tbsp
2 Tbsp = 1 oz.
16 Tbsp = 1 cup
1 cup = 8 oz. = 16 Tbsp = 48 tsp
1 pint = 2 cups = 16 oz. = 32 Tbsp
1 quart = 2 pints = 4 cups = 32 oz. = 64 Tbsp
1 gallon = 4 quarts = 8 pints = 16 cups = 128 oz. = 256 Tbsp
1 pound = 16 oz.
These fine measurements are going to be your best friend once you memorize them. Knowing these can save your recipe if you ever come into a situation where you think you measured either too little or too much, and then you can start substituting for what you did or do not use.
The last conversion, which is one of the most important:
1 oz. = 28.35g
1 pound = 454g
1kg = 1000g = 2.02 pounds
These conversions will help when looking at fine recipes. Grams tell an almost exact amount, while with pounds and ounces, there is some wiggle room- pastry chefs do not like wiggle room, when producing at a large volume, exaction is needed! Study these measurements, quiz yourself, I love converting things, it challenges my mind and sometimes, I find easier ways to go about things.
Knives & Knife Cuts
To start, I would like to say knives are a dangerous tool, but a beautiful creation. They can be your best friend if you know how to use them, and take care of them, or your worst enemy if you become afraid of them, or if you neglect them.
Lets start with this: there are a multitude and wide variety of knifes, and types, and styles. The basic style is a chef knife- which is what we'll be talking about today. Within a knife there are key elements that need to be known for the proper usage and care of the knife:
Lets start with this: there are a multitude and wide variety of knifes, and types, and styles. The basic style is a chef knife- which is what we'll be talking about today. Within a knife there are key elements that need to be known for the proper usage and care of the knife:
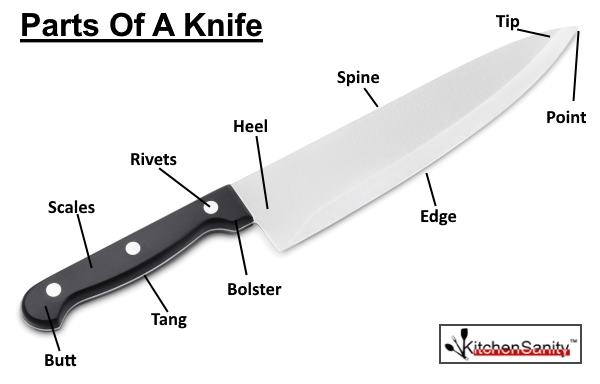
Here we can see that there is more to a knife than its handle and blade, there are key components that help a chef know how to understand his/her knife. Now I want to get into, in my opinion, the most intimidating part of the knife- sharpening.
Sharpening a knife is easy when you learn and understand how to do it. Until then, however, it can become tedious and hard to do.
To begin, one should start by obtaining a whetstone; this tool is what is going to shave the actual metal off the edge of your knife to create a brand new surface and a clean, sharp edge for you to start chopping away!
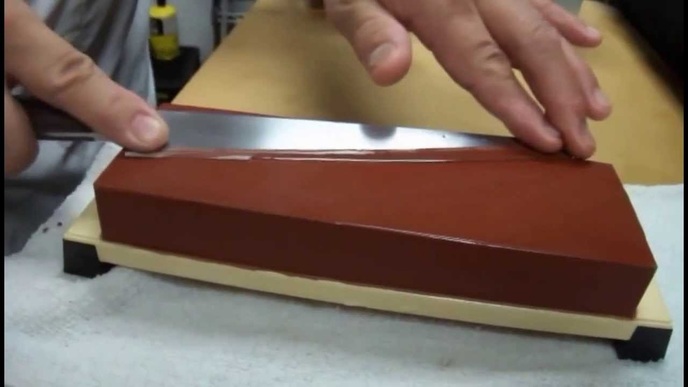
For this, your knife should be at a 20° angle, and making a curve, glide the knife across the surface of the whetstone. You'll want to do this about three times to make certain that the knife is making contact with the whetstone.
The next step is honing the knife, ever hear of that? Honing, is another word for cleaning or straightening the edge of the knife. This should be done after every sharpening and sometimes in between uses.
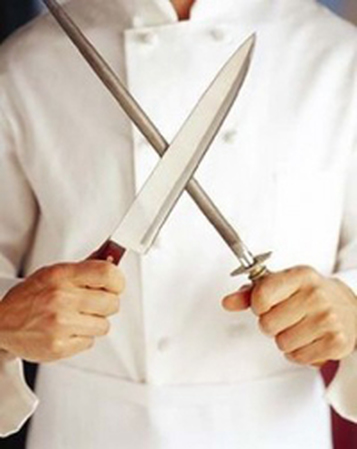
Honing the knife is going to keep the edge of the knife straight and clean. This should also be done at a 20° angle, with the knife at that angle, you'll want to make a 'J' shape, doing this three times as well. After doing this process, slide your knife horizontally among your fingertips, the edge should feel like it's gripping your fingerprints. That's when you'll know you have a very sharp knife!
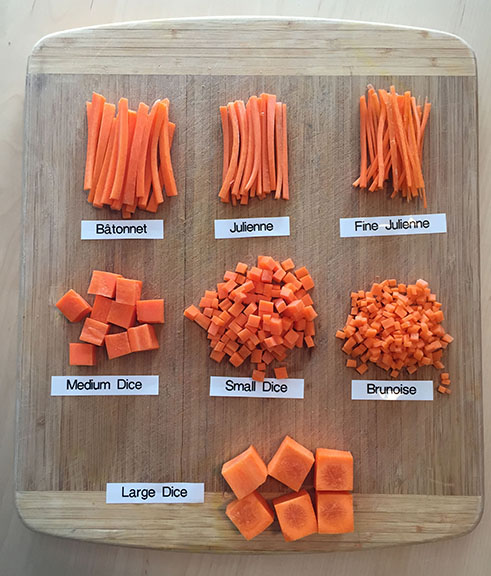
Now, with your ever so sharp knife, you can start to practice your knife cuts. Knife cuts are some of the most important basics a chef knows. It shows skill, technique, and professionalism. Practice these cuts on potatoes or apples, something easy to cut with a lot of surface area. I am not going into much detail about the cuts, because they become complex to explain. Youtube videos are the best way to go because it shows the visual of the cut and can easily be followed.
Chocolate Piping
Chocolate piping is one of the most tedious tasks. Although it becomes fun after the practice, it takes a while for one to master the technique of piping chocolate.
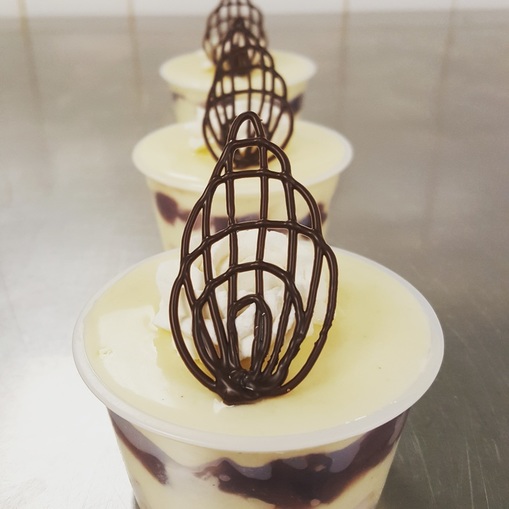
Pipe small or don't pipe at all! When you're learning how to pipe chocolate, you want to be careful as to how big the hole is for piping your chocolate. If the hole is too big, your lines will most likely spread and your design, or writing, will have to be bigger than what was originally intended.
Making a parchment bag can really help in your endeavors as a pastry chef. You can buy parchment bags from the store, or you can make your own from parchment paper. On this website, you can see step by step how to make a parchment bag:
Making a parchment bag can really help in your endeavors as a pastry chef. You can buy parchment bags from the store, or you can make your own from parchment paper. On this website, you can see step by step how to make a parchment bag:
|
|
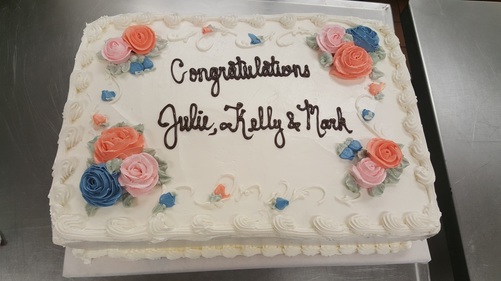
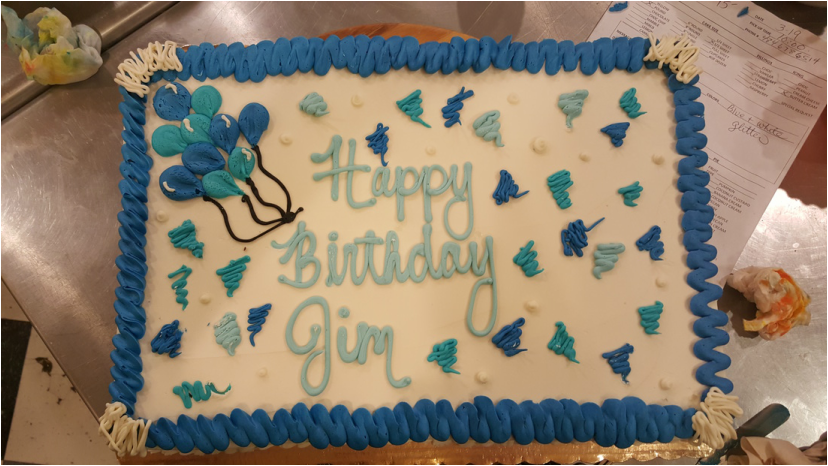
The images above are both half sheet cakes that I have decorated. On the right, the cake was decorated with swiss meringue buttercream, and chocolate writing. On the left, the cake was decorated with American buttercream. I find it a lot easier to write with buttercream because there is more control available.
Have fun with this, don't think too hard about it because that's what will make you mess up. Also, don't give up! If you don't do something write, thats means you're doing it wrong, which means you'll eventually find out what's making it wrong- correct it, and make it right! I am no where near perfect, or even good at this. I am still learning every day and that's what makes me "good."
Have fun with this, don't think too hard about it because that's what will make you mess up. Also, don't give up! If you don't do something write, thats means you're doing it wrong, which means you'll eventually find out what's making it wrong- correct it, and make it right! I am no where near perfect, or even good at this. I am still learning every day and that's what makes me "good."
Piping Buttercream Roses
Piping buttercream roses is one of my favorite things to do! I love the beauty of the rose, and once I got the technique down, I loved how fast I could pipe them!
Piping buttercream roses can be a little on the difficult side. For starters, you need the correct tools:
A piping bag
Semi-soft buttercream
Rose nail
Rose tip
Offset Spatula/Scissors
Wax Paper (for practicing)
When piping roses on anything, keep in mind the amount of space you'll need for writing, and the amount of space you're wanting to take up with the roses. Next, comes piping the roses, you'll want to be sure that your buttercream is not too warm, otherwise, it will be too soft to hold together.
With your piping bag, insert the rose tip, fill the bag, and prepare your area for piping. Notice with the rose tip how there is a fat end and a skinny end. The fat end is the base, it will help anchor the petals of the roses to the body. The skinny end will be for the petals, it is important to think of constant and consistent pressure with your roses. Consider not piping too hard, and not too soft, you want a decent rose, so think of a decent pressure for your buttercream.
Starting with a "blob," you'll want to make a little hershey kiss in the center of your rose nail. From there, you want to make a cone in the center of the blob. Now, this is the trickey part, this may take a view videos and lots of practice, with the skinny end sticking up, pipe three rainbows around the cone, with the tip at a 45° angle. Then five, then seven.
Blob - cone - 3 petals - 5 petals - 7 petals
Taking the rose off the nail can seem daunting, however, with practice and confidence, it becomes second hand. This is all to preference.

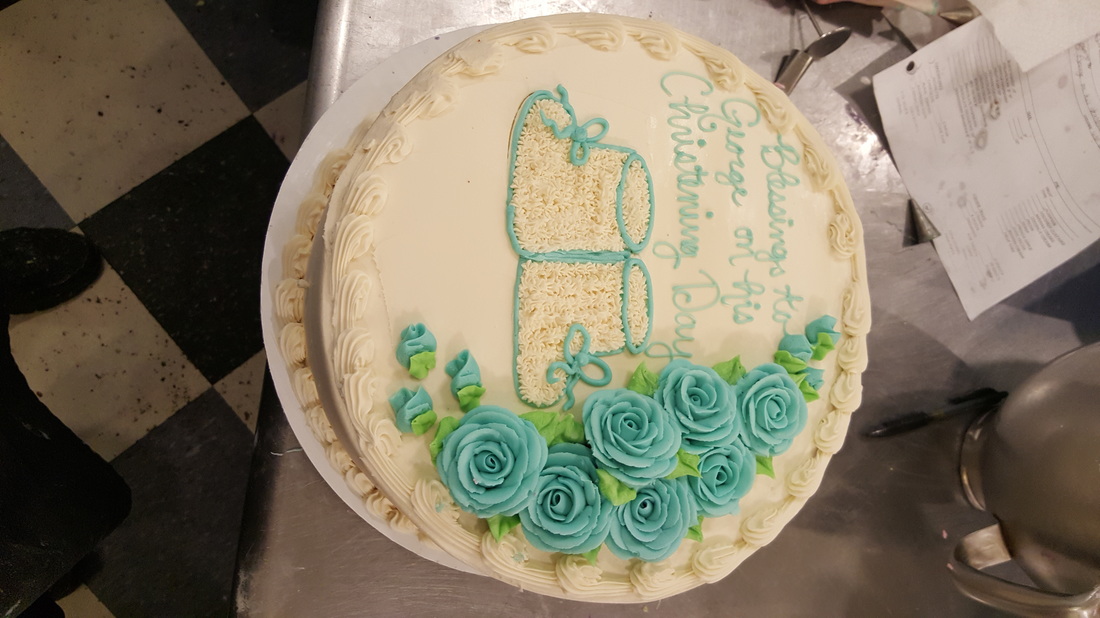
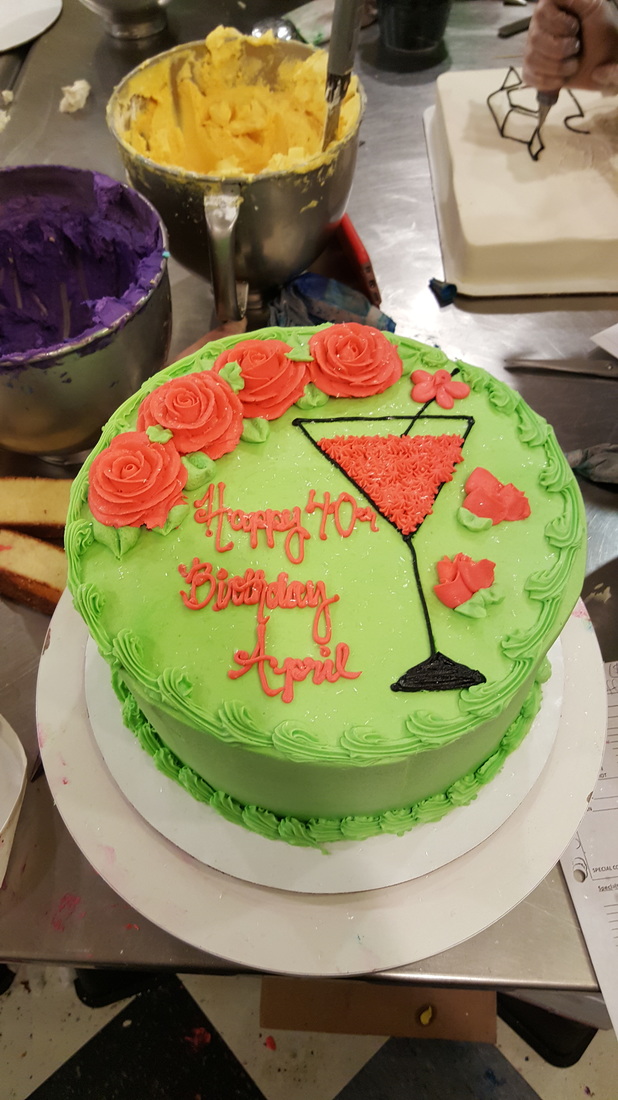
No two roses are the same. Everyone has their own style of piping and control of buttercream. Which makes your roses individual and unique. Practice makes perfect. Buttercream is sweet and edible. So practice, and then eat!! Cake should be standing by!!
